Sunday, August 4, 2019

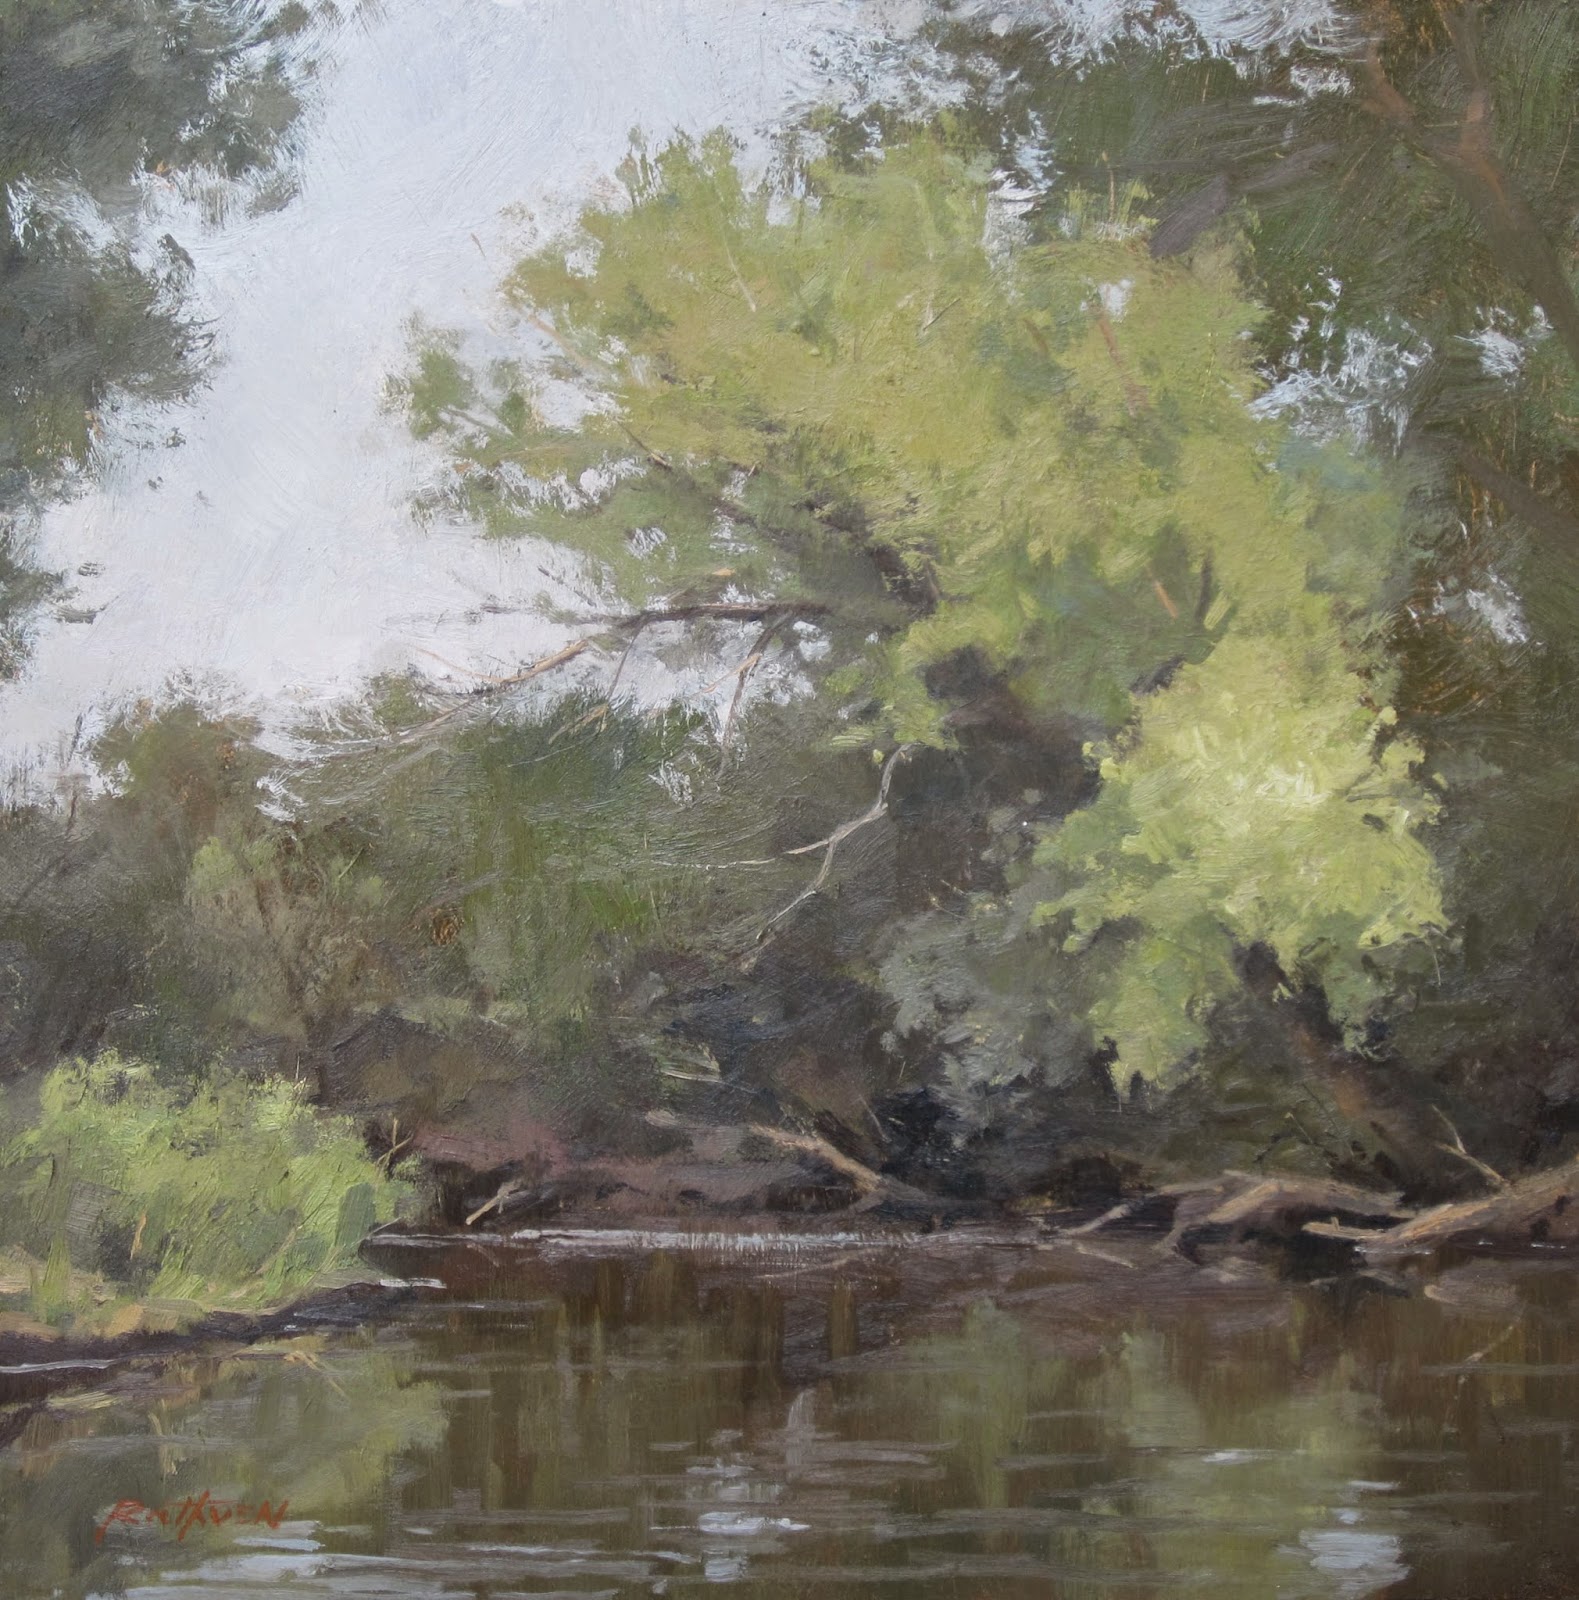
Musing on my emotional response to the landscape

Reykjavik, Iceland

I've spent hundreds of hours painting the landscape on location.  Early on it was a pursuit to make my painting look like the subject.  There was so much to take in and all the while the light, tones and colors were changing; so many details I had to get down to copy the scene.  Although stressful, it forced me to respond intuitively.  Over the years, this intuition has become the stronger force in my work pulling me to capture the feeling of the scene rather than simply its likeness.  Now I ponder the success of my painting by the connection I had with the scene and how I communicated my emotional response to it rather than my ability to match the scene color for color, tone for tone.  These are the paintings that take me back to that place where I can hear the birds chattering at one another and the squirrel barking an alert of the fox slinking through the tall grasses.  I can once again feel the heat of the radiating sun drawing beads of sweat from my skin and then suddenly the respite of cool shade courtesy of the sole cloud passing in front of it.

Scott Ruthven

Painting Reykjavik Harbor - Scott Ruthven

Tuesday, July 9, 2019

New Ultimate Plein Air Gear Video


My students always tell me how much they love the part of my workshops when I go through my plein air gear.  With so many gear options to choose from, it can be daunting to take the leap and try plein air painting.

So, after months of filming and editing, I have released a full-featured, 38 minute long video where I show you everything I take in my pack to paint on location in oils.

Now everyone has access to this part of my workshops without the cost of actually attending a workshop.  And...I'm making the video very inexpensive so anyone can afford it!  After all, my goal is to create more joy in our world by creating beautiful art and teaching others how to do the same.  With the information in this video, you'll have the courage and confidence to experience the joy of plein air painting.

"From backpacks to brushes, paints to pochade boxes, and everything in between!"

Click the link below to learn all about the video and to purchase it if you so choose.

Click here for more info --->  Scott's Ultimate Plein Air Gear Video


Wednesday, September 5, 2018

Ultra Portable Painting Kit

What do you call an all-in-one, super compact painting kit?


A THUMB BOX!!

Definition Thumb Box:  "A small box that contains painting materials, a panel for mixing colors, and a small canvas or boards and has a thumb hole or other device by wich it can be held upon the thumb like a palette to make a small sketch usually in oil." - Merriam-Webster


Among painters, a thumb box is sometime called a cigar box, since many a homemade thumb box has been made from a cigar box.  Well, that's precisely what I used to make mine.  You see, I like to tinker, so of course I made my own.  Since I didn't have any plans to follow, I began by finding a suitable cigar box.  Turns out there is demand for cigar boxes and the local smoke shop didn't have any to give or sell.  That's fine because I ended up finding a cool old one at the antique shop for $3 USD.  With box in hand, I knew the dimensions I had to work with and began scrounging together the wire and plastic scraps to complete my project.

If you want to make one for yourself, don't worry about plans and instructions, just get a box and design it around your needs.  The golden design rule "form follows function" is spot on!


I store four tubes of Gamblin's FastMatte oil paint (white, ultramarine blue, cad red light and cad yellow), two brushes with the handles cut down so they fit in the box, a palette knife and a little bit of Gamblin's solvent free gel in the box and keep the kit under the seat in my truck, along with a 5"x7" primed panel.  If I have a few minutes and an intriguing scene, I just grab the kit and paint!


Thursday, November 10, 2016

Limited Palette As A Strategy

Swedish artist, Anders Zorn (1860-1920), produced many amazing paintings using a limited palette of colors*.  Having a limited selection of colors can simplify mixtures and improve color harmony within a painting.  I'll show you how I sometimes employ it as a strategy to achieve a desired outcome.

While I generally have a warm and cool of each primary plus white on my palette, from time-to-time a subject calls for a constraint of color choices.  For example, my vision for the painting below was to create a sense of the soft, cool, atmospheric conditions we see just after sunset in November, here in Colorado.  The sky is colorful but not too saturated and the overall feeling calls for values in the middle of the value range, not letting areas get too light or dark.  So, starting with a red, yellow and blue, I further constrained my options by tinting each with white to get a lighter, less saturated version from which I could no longer mix a dark, dark or a highly saturated color.  These three muted primaries + white then became the palette from which I painted "November Sky".


Scott Ruthven
November Sky
10"x8" | Oil
This painting is available for purchase here

My muted three primaries


 *Here's a link to a great article on James Gurney's blog about the Zorn Palette.

SaveSaveSaveSaveSaveSaveSaveSaveSaveSaveSaveSaveSaveSaveSaveSaveSaveSave
SaveSave

Sunday, October 16, 2016

How To Make A Wet Panel Carrier

Here's a quick tutorial showing how you can make a wet panel carrier from basic materials.

Materials I used to make this box which fits (4) 8"x10" painting panels :
1.5"x3/4" pine or poplar or oak board that's 28" long at a minimum.
2pcs 1/8" MDF board about 9"x12" (you will need to cut it down to size later)
Wood glue
18-20 Small brad type nails.
Hammer, table saw.

Step #1 Cut the channels / slots
Using a table saw, cut channels in the 1.5"x3/4" length of wood.  The channels should be about 1/8" deep and about one and a half widths of the saw blade.  This allows enough room for the painting panels to slide freely in these channels / slots.  Try to space four slots equally across the long face of the wood.  You want enough gap between slots so your wet paintings won't touch.


Step #2 Cut the slotted 1.5"x3/4" into the two side lengths and one length for the bottom:
By cutting the channels first, while the board is in one length and then chopping that board into the sides and bottom, you ensure the slots align perfectly.  You'll understand this when you assemble it!


Step #3 Layout the sides and bottom pieces with the channels and attach the 1/8" MDF panels for sides.
Now remember, if you want a carrier that holds 8x10" panels, have a few on hand and make all your measurements and cuts so the panels will fit perfectly into the channels.


I used wood glue and small nails (I actually used small brads since I have a nail gun) to attach the MDF to the 1.5" wood with the channels.  You can put a couple of 8x10 panels in the carrier and use clamps to hold the unit together while glueing up to be sure the unit is square and will hold your panels.


Step #4 Cut and fit the lid.
The lid is another piece of the 1.5" wide wood, but only 1/4" thick.  It has no grooves since the painting panels will slide down into the box and be flush with the bottom-side of the lid.  It is cut to fit exactly into the top recess in the box.  I also sanded the bottom edge where the lid pivots against the box...this inside edge needs to be rounded off so the lid can open and close easily without catching on the box.
To attach the lid, I drilled a hole through each sidee of the box, into the side edges of the lid (which I held in it's final, closed position, while drilling).  I inserted a small nail into each of these holes as a hinge.

Step #5 Final sanding
Once the box is assembled I sand the outside edges of the closed box lightly so all edges are flush and slightly rounded to the box feels and looks nice.

Step #6 Stain and seal
Finally, I added a red stain to the sides and then applied polyurethane to all of the outside surfaces.  You can omit the stain if you want but I do suggest sealing the wood with polyurethane to protect it.


Stanley Hotel

Stanley Hotel

Scott Ruthven
Stanley Hotel (Study)
11"X14" Oil on Linen Panel
The Stanley Hotel is in Estes Park, Colorado.  Built by F.O. Stanley (of Stanley Steamer fame) in 1909 to be one of the grandest hotels in the world.  It was originally painted yellow but I personally love the sharp, clean white and red combination.  Some of you may also know it was the inspiration for Stephen King's "The Shining" and parts of "Dumb and Dumber" were also filmed there.

I started this painting on location so as to really capture the early morning light.  I finished up the indication of windows and other details back in my studio.  I would like to make a much larger studio painting from this piece.

Click here to see it on my website.


Saturday, August 8, 2015

Sunshine At Rainbow Lakes

"Sunshine at Rainbow Lakes"
6"x10" Oil on Linen mounted to Gatorboard
I painted this on location in the Colorado Rockies, Northwest from Boulder, Colorado.  It is oil paint on linen which is mounted to archival gator board.  All materials are of the highest quality and it has a protective varnish applied.  I have signed the front and back.  The painting measures 6"x10" and is mounted to a 10.5"x14.5" piece of black Gatorboard.  You can frame it or display it as is.

$99 Ebay Auction:
Sold, but you can see what's currently up for auction by clicking --> HERE <--

Friday, August 7, 2015

How To Make a Paint Box and Panel Support - Part III

In this third and final post, I'll show you how to make the panel holder which secures your painting surface to your tripod.


The wooden contraption holding my painting is the panel holder

Material list:

  •   (1) 1"x2"x4' piece of oak or similar hard wood.
  •   (1) 1/4"-20x5/16" T-Nut.
  •   (1) 1/4" x 1.25" long carriage bolt.
  •   (1) 1/4" female thumb screw head.
  •   (1) Metal washer to fit around the 1/4" bolt.
  •   (2) Small 3/4" nails and some wood glue (to attach the bottom ledge to the main body).

I bought all the parts at my local Home Depot but you can find the wood at most lumber yards and the hardware at ACE hardware or other hardware stores.

Required tools:

  • Fine toothed hand saw
  • Table saw
  • Drill
  • 3/4" spade drill bit
  • 3/8" regular drill bit
  • 1/4" regular drill bit
  • Hammer

The main component of my holder is the 1"x2", 4' long piece of oak.  The actual size is .5"x1.5"x4'.  I chose oak because it is a rigid hard wood that will stand up to some abuse but you can use whatever you want.

Process:

1. Cut this 4' piece of oak into the following lengths:

  • (1) 24" piece for the main body
  • (1) 4" piece for the bottom ledge
  • (1) 6" piece for the top support 

2. With your table saw, plunge cut a slot lengthwise down the center of the 24" piece.  The slot must be a little wider than 1/4" so the bolt you will run through it can move along the length easily.  This is a tricky and dangerous cut to make and you should not attempt it if you are not trained and familiar with this type of cut on a table saw.  The slot should start about 3" down from the top and end 3.5" up from the bottom of the 24" main body piece.

3.  With a 3/4" spade drill bit, drill a hole halfway through the main body piece, 2" up from the bottom.  Center this hole on the 1.5" width of the board.  Then, switch to a 3/8" standard drill bit and drill a hole in the center if this 3/4" hole that goes the rest of the way through the board.  This is where you will mount the T-Nut in the next step.

4. Insert the 1/4" T-Nut into the hole you just drilled.  The T-Nut has four spines that you want to drive into the wood so it will not turn when you attach the tripod mount to it.  You can set the T-Nut in place by hammering it down with a small block of wood or dowel.  It should be recessed into the 3/4" hole you drilled.

5. Angle your table saw blade to cut a 15 degree bevel along one long edge of the 4" and 6" pieces.  This bevel will help hold on to your painting panel.

6. Attach the 4" bottom ledge piece perpendicular to the 24" main body piece with the bevel edge facing up (see picture).  Attach it to the bottom end of the 24" piece, just below the T-Nut.  I put some glue on it and then nailed it to the 24" piece.  You want to make sure this 4" piece is at a 90 degree angle to the 24" piece.  This 4" piece is what supports the bottom of your painting panel.

7. Drill a 1/4" hole all the way through the 6" top support piece...centering the hole 3" from either end.

8. Coat all the wood pieces with polyurethane.  This will protect the wood, waterproof it and make it easier to clean.

9. To attach the top support piece to the main body, insert the 1/4" carriage bolt through the slot on the 24" board from the back then through the hole you drilled in the 4" top support piece.  The bolt should protrude 1/4".  Place the washer over the end of the bolt sticking out and then screw on the thumb screw head.  You can now adjust this top support up and down the main body and use the thumb screw to tighten it down.

10. Screw on the tripod mounting bracket that came with your tripod to the T-Nut from the backside of the panel holder.

11. Attach the holder to your tripod.

12. Now you can secure a painting panel to the holder by adjusting the top support to accommodate whatever panel size you are using.


Here's a closeup of the bottom end of the holder.

1/4"-20x5/16" T-Nut
The top support assembly

My camera to tripod mounting bracket attached to the T-Nut on the backside of the panel holder.

So, now that you know how to make one, unless you love woodworking, save yourself the hassle and buy the whole setup from James Coulter at http://artboxandpanel.com/.  I don't know James and get no profit from this but I'm telling you, you can get the palette and panel carrier and even a tripod from him for a great price and he makes a great product.

Now get out there and paint!


Sunday, October 5, 2014

My Unbelievable Night!

As I get ready to submit my paintings for the 2014 Colorado Plein Air Arts Fest, hosted by the Golden Triangle Museum District in downtown Denver, I realized I never wrote a post about the FANTASTIC night I had last December at the 2013 show.

Scott Ruthven -  2013 Colorado Plein Air Arts Fest Awards

I entered three paintings and all three won awards!!!  Wow, was I shocked when I walked in and saw the award medallions.


  • The painting on the left, "San Pellegrinos & Lime" won 2nd place in the professional artist category
  • The middle painting "East on 16th From the D&F Tower" won the "Prudent Man Award of Excellence.
  • And the painting on the right, "Aligned and Sublime" won an honorable mention.
54 professional artists had work juried into this show, which makes winning these awards even more special to me.

You can see all the work and full list of award winners here.

Cheers,
Scott


Wednesday, September 10, 2014

Paint The Poudre Plein Air 2014

Here are my five paintings from the "Paint The Poudre Plein Air" competition in Fort Collins, Colorado this July.

Drive-in, Mishawaka Style, 12"x9", Oil
©Scott Ruthven 2014
Fist Place Winner and Purchase Award Winner

Balance and Grace, 12"x12", Oil
©Scott Ruthven 2014

Evening Walk, 11"x14", Oil
©Scott Ruthven 2014

Quiet Pastures, 11"x14", Oil
©Scott Ruthven 2014


Last Light on The Poudre, 9"x12", Oil
©Scott Ruthven 2014


To cap off the week, I was thrilled when the amazing landscape painter, Marc Hanson, awarded my painting "Drive-in, Mishawaka Style" first place!  
Marc is a wonderful person and artist whom I have learned a lot from over the years.  Receiving this award from him is something I never would have imagined just a few years ago.


Receiving my award!
Photo credit: Ani Espriella

Cheers,
Scott

Sunday, August 31, 2014

Banish Your Paintings To The Closet!

The value of putting a painting away for a while then taking a fresh look at it later.

As artists, we get so involved with a piece that our brain starts to see what it wants and often will overlook the most obvious of flaws.

Here are two of my paintings where this happened.

"B's" and Smiley faces

In the painting with the plane, somehow, the dashes and dots of color I built up in the trees formed a perfect capital 'B'.  You can see it dead center in the detail photo (2nd below).  It wasn't until I was looking at thumbnails of the painting on my computer that I noticed it.

Scott Ruthven


Scott Ruthven


In this painting, done plein air, the tangle of roots and dead branches at the base of the fallen tree formed a pretty clear smiley face, complete with a long nose!  It looks like a character from the Wizard of Oz.

Scott Ruthven

Scott Ruthven

Maybe, there is something else happening here...some larger code being delivered through me over the course of my painting career.  Hmmmm....just saying :-)  Anyway, fixing these was easy enough, you just hope you find these things before the painting makes it out into the world! 

Of course, once you find a flaw it is the ONLY thing you can see from then on.  It SCREAMS at you to be fixed!

Scott 


Saturday, April 19, 2014

Ahhh, Springtime!!

Finally, Spring has come to Colorado.  I love painting winter scenes, but it sure is nice to mix up some greens and dollop on some pure cadmiums!

Here are two recent paintings.

Plein Air
Springtime In Boulder, Colorado
10"x8" | Oil on linen panel
Painting this scene of the foothills and snowcapped peaks from Boulder Colorado was a real treat.  In this one scene you experience the cold, snowcapped mountains, the foothills, which have just a bit of now on them and the fields bursting with golds and greens of Spring.

-----------------------------------------------------------------------------------

Plein Air Garden Birds
A Spot For Tea
10"x8" | Oil on linen panel
This was a quaint garden at an early 20th century home in Eaton, Colorado.  The Forsythia is in full bloom and the larger trees on the property create that wonderful dappled light on the lawn.  What a lovely spot to sit with a cup of tea and listen to the birds.


Thursday, November 14, 2013

Painting At The Historic Daniels & Fisher Tower in Denver


This past September I was given the opportunity to paint from the observation deck on the 14th floor of the Daniels and Fisher Tower in downtown Denver.  Built in 1910 and modeled after St. Mark's Bell Tower in Venice, Italy, the D&F tower was the tallest structure between the Mississippi and California for decades.  

This observation deck is not open to the public but a generous supporter of the arts has offices in the building and extended this offer to a handful of artists.


I arrived at 8AM and stepped out onto the three foot wide balcony for a wonderful view of downtown Denver.  This deck wraps all the way around the building, allowing me to choose from several views.  It was clear, however, that the soft, cool morning light streaming between the buildings and the atmosphere that builds as your eye travels up the long street was what I wanted to capture.

The street in the painting is 16th and it is closed to cars.  Instead, trees are planted down the center with nice, deep sidewalks down either side and in the middle, under the trees.

I brought several different shaped panels to paint on but felt this 20"x10" format was the best fit.  Compositionally, I used the long, dark rectangle on the left...it's a building of course, but for my painting I left it as a single dark tone with only a few suggestions of windows and ledges.  This framed the street, gave scale to the buildings and contrasted with the light and detail in the street.  Likewise, the distant buildings are suggested tonally but without detail.  These distant buildings create an interesting shape and blend with the sky to build the feeling of atmosphere.  The corner of the rooftop in the lower left points the view into the picture.  From there the delicate shapes of light take your eye on a journey up the street.  People walking, the colored awning and details on the building facades on the right give us some places to stop and look at more closely.  It is a city waking up, people enjoying a quiet walk and merchants setting up for business.


The View!


These are the artists I painted with from left: Mikael Olson, Ken Valastro, Cheryl St John, Terrie Lombardi.  Click their names to check out their art.  We were having a toast with our wine served up in bowls since we forgot glasses!  Wine in bowls, pizza, and a day of inspired painting with wonderful people....I'm blessed!


"View of 16th From The D&F Tower" - ©Scott Ruthven
20"x10" Oil on canvas panel 2013

And, as if the painting experience wasn't wonderful enough, the painting was juried into the 2013 Colorado Plein Air Arts Fest (The country's largest urban event of its kind) where it won the "Prudent Man, Award of Excellence" and sold on opening night!


If you like my art please tell your friends by sharing this on Facebook, Twitter or Google+ by clicking the links below!  

Also, consider signing up for my newsletter.  I will be offering special pricing on a bunch of paintings for the holiday season soon - available to my newsletter subscribers first!


Wednesday, October 16, 2013

How To Make a Paint Box and Panel Support - Part II

This is the second in a series of posts on how to make your own portable painting palette and panel holder for plein air painting. 

After staining and coating the panels with 2-3 coats of polyurethane the next step is to attach the side trays to the center palette with some hinges.  I clamped the side tray/lid pieces to the center palette in their closed position then placed the hinges where I wanted them and drilled pilot holes for their screws.  Repeat this for the tray on the opposite side.


Once the hinges are in place I stuck one vinyl feet/bumper next to each hinge as shown below.  These provide a stop for the side trays to rest against when in the open position (second picture below).  This is important to ensure the side trays don't open past 180º.... because if they do then anything you rest on them (turps, brushes, cellphone) will slide off!


Now you need some way to attach your new paint box to your tripod.  I cut two "L" shapes out of 3/4" plywood (I'll call these the "hooks" from now on).  Since each tripod is different I suggest you hold up your new paint box to your tripod to get an idea of how big the hooks should be and where on your paint box they should be mounted.

Once the hooks are cut out you will need to drill a hole through them and into the side of the palette portion of the paint box.  I used a 1/4" threaded bolt that is 3" long to attach my hooks.  Therefore, I drilled a 1/4" hole through the hook and palette (see below).


Now these 1/4"x3" bolts will need to screw into something.  So, I decided to use a product called a "T-Nut" pictured below.  Basically, these are female threaded parts that have four spikes that bite into the wood and provide a strong hold.

I inserted one T-Nut into each of the 1/4" holes just drilled.  Insert them from the INSIDE of the palette and then use a C-Clamp to push the spikes on the T-Nut into the wood.


Now go ahead and thread the bolts through the hooks and screw them into the holes with T-nuts on the palette.

Now, take the palette box to a glass store and have them cut a piece of glass to fit inside the palette.  Cutting glass is easy and if you have a cutter and feel comfortable doing it then just pick up a piece of glass from the hardware store and cut it yourself.  You don't want the glass to fit too tightly or you risk breaking it.  I left a 1/32" gap around the perimeter of the glass.

I then took some grey oil paint straight from the tube and smeared it on the perimeter of the glass surface filling the gap between the glass and palette box and leaving a thin coating on about 1" of the glass.  I took a straight edge razor blade to scrape off excess paint from the glass and leave this nice straight edge before the paint dried.  This coat of paint serves two purposes - 1. filling the gap so paint and mineral spirits don't seep under the glass and 2. providing a surface for the puddles of paint to grip to so they don't slide across the slick glass.  Let this paint dry thoroughly before you start using the palette.


And here's how your paint box / palette should look when open! 

One other note:  I counter-sunk magnets into the ends of the side trays (pictured below).  When you close the trays the magnets pull together and keep the box closed and when the trays are in the open position, the magnets are a great place to stick your palette knife to.  I bought the magnets then drilled a shallow hole the same size for the magnet to sit in.  I then used a two part epoxy to glue the magnets into the holes. These "earth magnets" are strong so you need epoxy to keep them from pulling out when they stick to one another.  Magnets are a nice touch but are optional.  You could use a clasp or some other type of simple latch to keep the box closed when transporting.


That completes the palette / paint box.  In my next post I will show you how to make the painting panel support.
Closed palette box shown here hanging from my tripod


Related Posts Plugin for WordPress, Blogger...