Pages

Sunday, June 23, 2013

Four Paintings, Four Locations, in Fourteen Hours - PAAC Painting Marathon

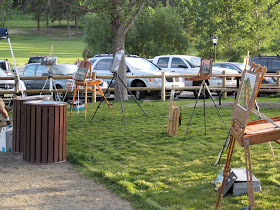
Plein Air Artists Colorado held their first dawn to dusk painting marathon Saturday and I decided it would be a good "workout" for me.  We started at 5:30AM with a sunrise painting in Denver, Colorado.  Next we drove to the world-famous Red Rocks Amphitheater for a second painting.  After  lunch we drove further into the mountains for an afternoon painting then ended up in Evergreen, Colorado for our final evening painting and show.  It was great fun!  Here's my work for the day, in chronological order:

Denver at Dawn
6.5"x6.5" Oil on Linen

Glowing Light at Red Rocks
12"x12" Oil on panel
Spring Flower on the Forest Floor
6"x8" Oil on linen

Last Light on the 18th Hole
9"x12" Oil on wooden panel

The Artist's work on display

Saturday, June 15, 2013

Perfect Spring Morning


Cool mornings, cotton candy clouds, trees budding with new life and meadows full of wild flowers - that's what this painting is all about.

"The Perfect Spring Morning"
9"x12"  |  Oil on linen panel  |  © Scott Ruthven 2013  |  Private collection


Thursday, June 6, 2013

New Painting - Spring Growth


Spring is magical in the Rocky Mountains.  The soft, rubbery new growth on the tips of the pine trees inspired this painting.  The bright greens on the tips contrast nicely with the violet Pasque Flower blossoms on the forest floor.

"Spring Growth"
8"x6" |  Oil on linen mounted to gatorboard


Monday, June 3, 2013

Homemade Wet Panel Carrier

Well, here I go again...instead of forking over $20 for a commercially available wet panel carrier my creative self says "you can make that from crap laying around the garage" AND, "it shouldn't take more than 30 minutes".  Of course it took more than 30 minutes but I did re-use a "found" 18"x24" campaign sign which makes it a one-of-a-kind.

Here are the steps:

This is the 18"24" campaign yard sign (I have already made the cuts necessary).  It is made of corrugated plastic.

After measuring for the panel size I need to store (9"x12" for this one) I laid out the fold lines with pen and used a razor blade to carefully cut these channels to allow for folding.

Testing the folds:


Here I'm gluing guides (1/8" wood strips from Hobby Lobby) to the inside of the plastic shell.  Super Glue works great.  Space wood to allow for single or back-to-back storage of the panels you use.  The two edge pieces of the box are also shown here - they have wood guides glued to them and aligned with the guides glued to the bottom of the main box.

Guides are spaced to store a single panel on each end and two back-to-back in the middle.

The box assembled.  The two side/edge pieces are taped into place with strong duct tape - Gorilla Tape in this case:

I stuck on three hook and loop fasteners to the top flap will close securely:

Here's what it looks like with the panels loaded:


Good luck!